Cabinet Refinishing – A Great Option For Homeowners Looking to Modernize Their Kitchen Without Breaking the Bank
Cabinet Refinishing Modesto Anchor is a great option for homeowners looking to modernize their kitchen without breaking the bank. It also contributes to less waste by reusing material that would otherwise be thrown away.
Replacing cabinets is a time-consuming process that involves demolition and potential structural changes. It can also feel out of reach for many homeowners.
Refinishing and painting cabinets is one of the best ways to transform the look of your kitchen without a full renovation. But, before you reach for the paintbrush and begin your project, it’s important to understand the importance of a good primer. The right primer can make all the difference between a durable finish that lasts and a chipped, peeling mess.
There are a number of different types of primers, each designed for specific surfaces and purposes. For example, a bonding primer is ideal for glossy surfaces, while an oil-based primer works well on stained or wooden cabinets to prevent bleed through. In addition, there are a variety of tinted primers available that can help reduce the amount of finishing paint needed to achieve an even color.
The process of priming is also crucial to ensuring that your finished product will last. The primer helps to create a strong, even base that the topcoat will adhere to, and it also protects the surface from moisture and other damage. This is especially important with cabinets, which are often subject to daily wear and tear.
Primer is also helpful in preventing the “fisheye” effect that can occur when light colors are painted over darker ones. By filling in the small pores and crevices of the cabinet surface, the primer helps to ensure that the final color will be evenly distributed across the entire cabinet.
As with any paint job, the first step in applying primer is to thoroughly clean the cabinets. This should be done using a degreaser, such as Krud Kutter or TSP (trisodium phosphate). Any dirt, grease, or other grime will prevent the primer and paint from adhering properly to the surface. It’s also important to sand the cabinets before applying the primer. This will roughen the surface and provide a more even texture for the primer to stick to. After sanding, it’s a good idea to wipe down the surface with a damp cloth to remove any residual dust.
Primer is an essential part of any painting project, but it’s especially important for cabinet refinishing. It’s easy to skip this step and go straight to painting, but the results will not last. Investing the time and energy into a quality primer will pay off in the long run by ensuring that your finished product looks great for years to come.
Repair
When you’re refinishing cabinets, you keep the existing materials but apply a new finish to them. It can be a fresh coat of paint, but it’s often a stain. This is an option for homeowners who want to update their cabinets but don’t need something as dramatic as a full replacement.
To prepare for refinishing, you’ll need to strip the old finish and sand the cabinets to remove any dirt or marks. You’ll also need to repair any areas of damage like holes or scratches. You can patch these up with wood filler, sand and then prime. A good primer is important because it helps the paint bond to the wood and prevents moisture from damaging the surface.
During the refinishing process, you’ll usually use a chemical stripper to get rid of the old paint. This can be messy and time consuming, so it’s important to use the right safety equipment like gloves and long sleeves. It can also take some elbow grease to scrape off all of the layers, so you’ll need a lot of patience. Once you’ve stripped the cabinets, you can start to sand them and prep them for painting.
Before you paint, you’ll need to sand the cabinets again to ensure there are no imperfections. You can use a sander or a hand-held sanding block to do this. Once you’ve sanded, you can apply the first coat of paint and let it dry. Then, you’ll need to sand again and apply the second coat of paint. After the second coat dries, you can install the cabinets again.
Refacing cabinets is similar to refinishing in that you’ll be keeping the existing cabinet boxes and changing the doors and drawer fronts. However, refacing is a bit more extensive than refinishing since you’ll be replacing the fronts with new ones.
Cabinet refacing can be an excellent choice if you’re in need of a major kitchen makeover, but you don’t have the budget for replacement cabinets. Refacing, refinishing and repairing are all cost-effective options that save you money over completely replacing your cabinets.
Sanding
Cabinet refinishing is a more cost-friendly option than replacing cabinets. It allows homeowners to change the color of their cabinets without having to invest in a new set. However, it doesn’t have the transformative power of refacing. If you’re looking for a more dramatic change, consider refacing your cabinets.
Before starting the refinishing process, you should repair any cracks, dents or gouges with wood filler and sand the surface. It’s important to use a fine grade sandpaper for best results. Once the surface is completely dry, you can begin painting. Make sure to use two coats of paint for a more durable finish. Once the first coat dries, sand lightly and wipe down with a damp cloth.
If you’re planning on staining your cabinets, the same process applies as with paint. You’ll need to remove any existing topcoat and sand the surface to create a smooth finish. After the surface is sanded, you can patch any holes or dents with wood filler and sand again before applying the new finish. It’s also important to choose a quality stain, such as gel stain, so that it won’t peel or bubble.
While you’re sanding, make sure to check the progress regularly and replace your sandpaper as needed. Start with a coarse grit and work your way up to the finer grits for a smooth and flawless finish. Don’t skip grits, as this can cause damage to the surface of your cabinet.
Before you start sanding, protect your workspace with drop cloths and wear safety gear, such as eye protection and gloves. Once your work area is protected, clean the cabinet surfaces with a wood cleaner such as trisodium phosphate (TSP). This will remove any remaining residue from previous finishes and ensure that the new surface is ready for staining.
If you don’t have any nicks or scratches to repair, you can skip the sanding step and move directly to staining. Alternatively, you can use a liquid deglosser on your cabinets to roughen up the surface and help the stain adhere. This product is flammable, so be sure to work in a well-ventilated area. It’s also important to test your stain color on some scrap wood or a piece of your cabinet before you apply it to the entire surface.
Painting
Cabinet painting is a big job and requires more than just brushing on a coat of your new color. It involves a lot of prep work including cleaning, sanding, repairing and priming, and then applying multiple coats of paint and waiting for them to dry. When done poorly, the result can be unsightly and damage your cabinets.
When you’re painting your cabinets, be sure to start with a clean canvas and remove everything from the cabinet interiors, including drawers. You should also be careful not to damage your cabinet hardware, which can sometimes be difficult to replace. It’s a good idea to label your cabinet doors and drawer fronts as you take them off, so that when you reinstall them they’re back in the right place.
Once the surfaces are cleaned and sanded, you can begin painting your cabinet doors and drawer fronts. Be sure to apply a primer such as BEHR PREMIUM Multi-Surface Stain-Blocking Primer & Sealer or KILZ 2(r) All-Purpose Primer. This will help your finish last longer and give it better adhesion. Depending on the condition of your cabinetry, you may need to do several coats of paint to achieve a consistent and even look. It’s a good idea to lightly sand between each coat and wipe away any dust before applying the next one.
After the final coat of cabinet paint has been applied and allowed to dry, you can add some touch-ups as needed and install your cabinets back into the kitchen. It’s a good idea to replace the cabinet hardware once you’re finished, as this can make a huge difference in the overall look of your space.
Painting your cabinets can save you a lot of money and be an excellent DIY project. But if you aren’t careful, you can end up damaging your cabinets and reducing their lifespan. To avoid this, be sure to follow the tips above and use a professional who can handle all the prep and painting for you.
Effective Roof Repair for Long-Term Durability
Roof Repair Las Vegas NV ensures that your home remains safe and protected from the elements. Over time, roofs experience wear and damage due to weather and environmental factors. Regular maintenance helps identify issues before they worsen. Proper handling prevents costly repairs and structural problems.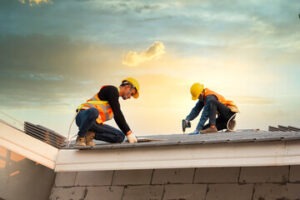
Leaks are among the most common roofing issues. Water infiltration can cause damage to ceilings and walls. Mold and mildew thrive in damp areas, compromising air quality. Timely repairs prevent further water damage and costly interior repairs.
Cracked or missing shingles expose the roof to weather damage. Strong winds and heavy rain worsen existing cracks. Replacing damaged shingles restores roof integrity. Professional installation ensures proper alignment and sealing.
Flashing protects roof joints from water penetration. Damaged or loose flashing allows water to seep into the structure. Repairing or replacing flashing prevents leaks. Proper sealing improves long-term water resistance.
Poor drainage causes water pooling and structural strain. Clogged or misaligned gutters direct water toward the roof. Over time, standing water weakens roofing materials. Clearing gutters and adjusting slope improve water flow.
Ponding water increases the risk of leaks and sagging. Roof sections with poor drainage retain moisture. Structural reinforcements and improved slope fix ponding issues. Proper water flow reduces long-term strain on the roof.
Ice dams form when heat escapes through the roof, causing snow to melt and refreeze. Water trapped behind ice dams seeps under shingles. Insulation and ventilation prevent heat loss. Removing ice dams prevents long-term damage.
Ventilation plays a key role in roof health. Poor airflow causes moisture buildup and temperature imbalances. Installing vents improves airflow and reduces humidity. Balanced ventilation extends the life of roofing materials.
Tree limbs and debris damage roofing materials during storms. Falling branches puncture shingles and create entry points for water. Removing overhanging limbs reduces the risk of damage. Regular maintenance prevents debris buildup.
Roof valleys direct water flow toward gutters. Damaged or improperly installed valley liners allow water infiltration. Replacing valley liners improves water flow. Proper sealing prevents leaks along roof intersections.
Chimneys and skylights require specialized sealing. Cracks around these openings allow water penetration. Applying waterproof sealant prevents leaks. Proper flashing installation improves resistance to weather exposure.
Moss and algae growth weaken roofing materials. Moist surfaces create ideal conditions for organic growth. Cleaning and applying protective treatments prevent regrowth. Moss-free roofs improve drainage and structural strength.
Blistering occurs when trapped moisture heats up beneath roofing materials. Expanding air pockets cause surface bubbles. Replacing affected sections restores a smooth surface. Proper installation reduces moisture trapping.
Sagging roofs indicate structural weakness. Water accumulation and poor support cause sections to bend. Reinforcing trusses and support beams restores balance. Proper slope improves water runoff and weight distribution.
Storm damage includes torn shingles, punctures, and structural weakening. High winds and heavy rain create pressure points. Emergency repairs secure damaged sections. Quick response prevents further interior damage.
Hail damage creates dents and surface cracks. Impact weakens roofing materials and reduces resistance to moisture. Inspecting and replacing damaged areas restores integrity. Hail-resistant materials improve durability.
Sun exposure causes roofing materials to degrade over time. UV rays weaken shingles and cause fading. Applying protective coatings reduces UV damage. Reflective materials improve heat resistance and extend roof life.
Roof coatings provide an extra layer of protection. Reflective coatings reduce heat absorption. Waterproof coatings improve resistance to moisture and leaks. Professional application ensures even coverage and long-lasting results.
Emergency repairs prevent damage from worsening. Temporary patches and tarps protect exposed areas. Professional assessment ensures proper restoration. Quick response minimizes repair costs and interior damage.
Underlayment acts as a secondary barrier against moisture. Damaged underlayment allows water to seep into the roof deck. Replacing underlayment restores water resistance. Proper alignment improves roof performance.
Roof edges are vulnerable to wind and water infiltration. Damaged drip edges and fascia boards allow moisture penetration. Replacing and sealing edges prevents leaks. Secure edges improve overall roof stability.
Roof valleys and intersections require precise installation. Misaligned materials create entry points for water. Reinforcing and resealing these areas improve drainage. Proper handling reduces long-term wear.
Chimney caps and vents prevent water and debris entry. Damaged or missing caps allow moisture and pests inside. Replacing caps and sealing openings prevent further damage. Secure fittings improve structural resistance.
Downspout positioning affects water flow away from the roof. Improper alignment causes water to pool near the foundation. Adjusting downspouts prevents soil erosion and structural strain. Controlled drainage protects roofing materials.
Metal roofs require specialized repair techniques. Rust and corrosion weaken metal panels over time. Cleaning and applying protective coatings prevent further damage. Secure fasteners improve panel alignment and resistance.
Tile roofs require careful handling during repairs. Cracked or displaced tiles expose the underlayment. Replacing damaged tiles restores surface protection. Proper alignment prevents further shifting and moisture penetration.
Wood roofing materials are prone to warping and rotting. Moisture and temperature changes cause surface damage. Treating wood and replacing damaged sections improve resistance. Proper sealing reduces exposure to moisture.
Synthetic roofing materials provide lightweight durability. Damaged synthetic panels or shingles require proper matching. Replacing damaged sections restores uniform appearance. Professional handling improves long-term performance.
Roof cleaning prevents debris buildup and surface damage. Leaves, branches, and organic material trap moisture. Clearing debris improves drainage and prevents moss growth. Regular maintenance extends roof life.
Skylight leaks often result from improper sealing. Cracks or gaps around the frame allow water entry. Reapplying sealant restores waterproofing. Proper flashing improves long-term resistance.
Solar panel installation affects roof integrity. Improper installation creates pressure points and moisture entry. Professional mounting and sealing improve stability. Reinforced structures handle panel weight and wind resistance.
Flat roofs require careful water management. Improper slope causes pooling and moisture retention. Installing additional drains and improving slope resolve pooling issues. Proper handling improves flat roof durability.
Sloped roofs improve water runoff and wind resistance. Damaged or misaligned shingles reduce performance. Replacing and resealing shingles restore coverage. Consistent alignment improves resistance to weather exposure.
Green roofs require specialized maintenance. Plant roots and moisture create pressure on the roof deck. Reinforcing the structure and improving drainage support plant growth. Proper handling extends green roof lifespan.
Cool roofs improve energy efficiency by reflecting heat. Damaged or discolored coatings reduce reflectivity. Reapplying reflective coatings restores cooling performance. Consistent surface coverage improves temperature balance.
Roof reinforcement prevents uplift and structural damage. High winds and heavy loads create pressure points. Installing bracing and securing materials improve resistance. Reinforced roofs handle weather impact better.
Ice and snow accumulation create structural stress. Improper drainage causes refreezing and surface damage. Heating cables and improved slope reduce snow retention. Quick removal prevents long-term strain.
Roof repair for historic buildings requires specialized materials. Matching original designs and materials preserves architectural integrity. Proper sealing improves weather resistance. Historical roof restoration requires expert handling.
Roof repair for commercial buildings involves large-scale handling. High traffic and heavy loads create surface pressure. Reinforced materials and proper sealing improve durability. Professional handling ensures structural balance.
Roof repair for residential homes involves customized solutions. Different roof styles require specific materials and techniques. Proper sealing and reinforcement improve protection. Regular maintenance extends roof life.
Professional roof repair prevents small issues from becoming major problems. Timely handling improves structural integrity and weather resistance. Expert installation and maintenance extend roof lifespan. Investing in quality repair ensures long-term protection and peace of mind.
How HVAC Systems Improve Indoor Air Quality
Indoor air quality plays a crucial role in maintaining a healthy and comfortable living or working environment. Poor air quality can lead to various health issues, including respiratory problems, allergies, and fatigue. Heating, ventilation, and air conditioning (HVAC) systems are designed not only to regulate temperature and humidity levels but also to enhance the quality of the air circulating indoors. 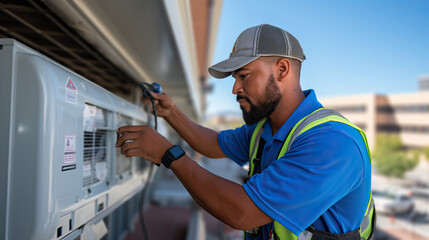
A properly functioning HVAC system filters out contaminants, regulates moisture levels, and ensures consistent airflow, all of which contribute to a cleaner and healthier indoor environment. Understanding how HVAC Orillia systems improve indoor air quality can help homeowners and building managers make informed decisions about installation, maintenance, and upgrades to optimize performance and health benefits.
One of the primary ways HVAC systems improve indoor air quality is by filtering out airborne particles and pollutants. Air filters are installed within the HVAC system to capture dust, pollen, pet dander, mold spores, and other microscopic particles that can compromise air quality. High-efficiency particulate air (HEPA) filters are particularly effective at trapping even the smallest particles, including bacteria and viruses. As the HVAC system circulates air throughout the building, the filters continuously capture and remove these contaminants, preventing them from being inhaled by occupants. Regularly changing or cleaning air filters ensures that the system functions efficiently and that air quality remains high. Clogged or dirty filters can restrict airflow, forcing the system to work harder and reducing its ability to filter out pollutants effectively.
Ventilation is another key factor in improving indoor air quality. HVAC systems are designed to ensure proper ventilation by introducing fresh outdoor air into the building while expelling stale indoor air. Without adequate ventilation, indoor air can become stagnant, leading to a buildup of pollutants, moisture, and odors. Mechanical ventilation systems use fans and ductwork to circulate fresh air and maintain a consistent exchange of indoor and outdoor air. This process helps dilute indoor pollutants and prevents the accumulation of harmful gases such as carbon dioxide and volatile organic compounds (VOCs), which can be released from household products, furniture, and building materials. Proper ventilation also prevents the buildup of excess moisture, which can lead to mold growth and create an unhealthy environment.
Humidity control is an essential function of HVAC systems that directly impacts indoor air quality. High humidity levels can create a breeding ground for mold, mildew, and dust mites, which can trigger allergies and respiratory problems. Conversely, low humidity levels can cause dry skin, irritation of the eyes and throat, and increased susceptibility to respiratory infections. HVAC systems are equipped with humidifiers and dehumidifiers to maintain balanced humidity levels throughout the building. During hot and humid weather, the system’s air conditioning function removes excess moisture from the air, reducing the risk of mold growth and improving comfort. In dry conditions, the system’s humidifier adds moisture to the air, preventing dryness and discomfort. Maintaining optimal humidity levels not only improves air quality but also protects furniture, electronics, and building materials from damage caused by excessive moisture or dryness.
Air purification is another important feature of modern HVAC systems. In addition to standard air filters, some systems are equipped with advanced air purification technology, including UV lights and electrostatic filters. UV lights installed within the HVAC system can neutralize bacteria, viruses, and mold spores by breaking down their DNA structure, rendering them harmless. Electrostatic filters use an electric charge to attract and trap airborne particles, providing an additional layer of filtration. These purification methods help eliminate harmful microorganisms and allergens from the air, creating a healthier indoor environment. Air purifiers integrated into HVAC systems are particularly beneficial for individuals with allergies, asthma, or compromised immune systems, as they reduce the presence of allergens and pathogens that can exacerbate health issues.
Consistent airflow is another key factor in maintaining good indoor air quality. HVAC systems are designed to distribute heated or cooled air evenly throughout a building, ensuring that every room maintains a consistent temperature and air quality level. The blower fan within the HVAC system ensures that air circulates continuously, preventing pockets of stagnant air where pollutants and moisture can accumulate. Proper airflow also helps prevent the buildup of carbon dioxide and other indoor pollutants, creating a more comfortable and breathable environment. Ductwork plays a crucial role in maintaining consistent airflow, as it acts as a pathway for distributing air throughout the building. Regular inspection and cleaning of ducts help prevent the buildup of dust, mold, and debris, which can restrict airflow and reduce air quality. Leaky or damaged ducts can also compromise air quality by allowing unfiltered air and contaminants to enter the system.
HVAC systems also help reduce odors and improve overall indoor freshness. Cooking smells, pet odors, and chemical fumes can linger in indoor spaces if not properly ventilated. HVAC systems equipped with ventilation and air purification features help remove these odors by circulating fresh air and filtering out odor-causing particles. Carbon filters, which are commonly used in HVAC systems, are particularly effective at trapping and neutralizing odors caused by smoke, cooking, and household chemicals. Maintaining clean air filters and ensuring proper ventilation helps eliminate unpleasant odors and create a more pleasant indoor environment.
Energy-efficient HVAC systems contribute to better indoor air quality by reducing the release of pollutants and improving system performance. Modern HVAC systems are designed to operate with minimal energy consumption while maximizing heating, cooling, and ventilation efficiency. Features such as variable-speed motors, zoning systems, and smart thermostats allow for more precise control over temperature and airflow, reducing energy waste and improving air quality. High-efficiency HVAC systems also produce fewer emissions, contributing to a cleaner and healthier indoor environment. Regular maintenance, including cleaning coils, checking refrigerant levels, and inspecting components, ensures that the system operates efficiently and continues to provide high-quality air.
Smart HVAC technology has further enhanced the ability to monitor and improve indoor air quality. Smart thermostats and air quality sensors allow homeowners and building managers to track air quality levels, humidity, and temperature in real time. These systems can automatically adjust settings to maintain optimal air quality and comfort. For example, if humidity levels rise above the desired range, the HVAC system can activate the dehumidifier to reduce moisture. If air quality sensors detect an increase in pollutants, the system can increase ventilation or activate the air purifier to remove contaminants. The ability to monitor and adjust HVAC settings remotely through mobile apps or smart home systems provides greater control over indoor air quality and ensures that the system responds quickly to changes in environmental conditions.
Proper maintenance is essential for ensuring that HVAC systems continue to improve indoor air quality effectively. Regularly changing air filters, cleaning ductwork, and inspecting components help prevent the buildup of dust, mold, and debris that can compromise system performance and air quality. Scheduling annual inspections and tune-ups with a qualified technician ensures that the system operates at peak efficiency and that any issues are identified and addressed promptly. Preventive maintenance also extends the lifespan of the HVAC system and reduces the risk of costly repairs. Investing in high-quality filters and air purification technology further enhances the ability of the HVAC system to maintain clean and healthy indoor air.
In conclusion, HVAC systems play a vital role in improving indoor air quality by filtering out pollutants, regulating humidity levels, and ensuring proper ventilation. Advanced air purification technology, consistent airflow, and energy-efficient operation contribute to a cleaner and healthier indoor environment. Proper maintenance and smart technology enhance the performance and effectiveness of HVAC systems, providing greater control over air quality and comfort. By understanding how HVAC systems work and the benefits they provide, homeowners and building managers can create a more comfortable and healthier indoor environment for occupants.
Cabinet Refinishing – The Easy Way to Spruce Up Your Cabinets
San Jose Cabinet Refinishing involves changing the color of your cabinets using stain or paint without removing anything. This is ideal for addressing scratches, dents, and faded colors while using the existing cabinets.
Typically, a light sanding is required between all coats. Please note that this process is impractical for thermofoil or laminate doors and drawer fronts.
Painting is one of the easiest ways to spruce up cabinetry, and refinishing can save you money compared to the cost of new cabinets. However, many details go into a professional cabinet painting job. First, the cabinets must be thoroughly cleaned to remove grease and oils that prevent a smooth finish. A good cleaning starts with a quick spray with an ordinary degreaser solution, followed by a wipe-down with a damp cloth. If the kitchen is especially dirty, you may need to use a more robust cleaner such as trisodium phosphate (TSP), available at hardware and paint stores. TSP works by emulsifying grease, so it is easily rinsed away with water.
After cleaning, a professional cabinet painter will scuff sand the surface of the wood to create a smooth profile before applying a quality primer. This is an important step that should not be skipped to save time or money. An experienced cabinet painter will also fill holes and dents before priming to ensure that the primer sticks well.
Once the primer has dried, it is ready to be painted and a professional will apply two coats to provide a consistent color with no thin or light spots. This technique is called “tipping off” and it is done by brushing the wet paint over a dry section of the previous coat to eliminate any noticeable line where the two colors meet.
It is a good idea to have a professional painter do your cabinet refinishing because it can be very easy to make mistakes that could cause the finished product to look less than perfect. Some examples include not sanding between coats, using the wrong type of paint for the job, and missing steps in the prepping process.
If you choose to do the refinishing yourself, be sure to take your time and do it correctly. You will be rewarded with a beautiful new kitchen and the best return on your investment is when you do things right the first time.
Keep in mind that cabinet refinishing does not allow you to change the style of the doors, so be sure you are happy with their current profile. Otherwise you will need to reface them instead.
Stain
Stain brings out the character of natural wood by showcasing its unique grain patterns and warm colors. It soaks into the wood, rather than sitting on top of it, giving it a rich look that fits design styles from traditional to contemporary. With stain, it’s usually easier to find touch-up markers than paint.
Cabinet stain requires a bit more prep than painting. You’ll need to remove the doors and drawer fronts (and hardware), then thoroughly wash them and their hinges with trisodium phosphate, or TSP, diluted according to manufacturer specifications. You’ll also need to sand the cabinets, then wash again. TSP can corrode metal hardware and damage finished surfaces, so you’ll need to mask them if necessary.
You can stain your cabinets while they’re still in place, but it will take longer. To do so, you’ll need to remove any exposed sides of the cabinets, and use a screwdriver to unscrew the cabinet door hinges from the cabinet box and set them aside. You’ll also want to lightly sand the cabinets, then wipe them down with tack cloth to remove dust and grease.
Once the sanding and cleaning are complete, you can start the staining process. Be sure to follow the product’s instructions for application, as well as the specific type of stain you’re using. For example, some woods can absorb multiple coats of stain, while others require only a single coat. You’ll also need to decide how long you leave the stain on before wiping it. Leaving it on longer will result in a darker color, while wiping it off sooner will make the color lighter.
Unlike painted cabinets, stained ones don’t hide dirt and dust as well. They’ll need to be wiped down more frequently, but the stains will add character and charm to your kitchen that you just can’t get from painted cabinets.
If your cabinets are dark now, it will probably be harder to lighten them than it is to make them lighter, as the existing finish might need chemical stripping or lots of sanding to get rid of it. In this case, it might be best to hire professionals to do the job.
Glaze
Glaze is a finish that can be used to enhance the appearance of your cabinets. When applied properly, it can provide a subtle shading effect over the surface or highlight grooves and fluting on cabinet doors and drawer fronts. It’s also an excellent choice for creating the impression of age and a weathered look. The color of glaze can be adjusted to create warm or cool tones, adding depth and enhancing the architectural details of your cabinets.
Unlike stain, glaze is thicker in consistency, allowing you to control the application. You can use a glaze over both painted and stained surfaces. It can be applied with a brush, rag or foam roller. If you choose to use a glaze on your cabinets, it’s best to seal them first so that the glaze doesn’t absorb into the wood and ruin the look of the cabinetry.
You can find pre-mixed glazes that are ready to apply or you can mix a glaze with paint, japan colors or universal tinting products to get a more customized tint. Whatever you choose, be sure to run a test sample before applying to the rest of your project. Oil-based glazes dry faster than water-based so they can be more forgiving to work with.
When choosing a glaze, be sure to ask your kitchen design specialist for advice and examples. They can help you select a color that will be the right match for your style and cabinetry materials.
You can add a clear topcoat over the glaze when it’s dry to protect the surface and keep it looking fresh. It’s best to wait until the glaze is dry before adding a sealer, however, as using a topcoat on a wet glaze can lift it off the surface and leave your cabinets with a dull, scratched finish. Some people choose to use a matte clear coat on their cabinets, which has a lower gloss level and is less susceptible to dirt build-up or scratching. Some people find that this type of finish feels more classic and timeless than glossy paint.
Brush Coat
The last step in the cabinet refinishing process is to apply one or more coats of paint. This gives the cabinets a fresh, new look and helps protect them from water and other stains. Cabinet painting requires precision to achieve a clean, even finish. Using a brush makes this more difficult, so the painter must be extra careful to create straight lines and cover large areas evenly.
Unlike spray paint, which must be thinned down to create a fine mist, brushes are great for any viscosity of paint. This means that painters can use thicker paint for better durability and coverage on the surface of the cabinets. However, this can also lead to sloppy applications that can leave behind visible brush marks or drips on the surface of the cabinets.
After applying the final coat of paint, it’s important to let it dry for a few hours. This gives the cabinet a chance to fully cure and makes it safe for normal usage. Then, the cabinet doors can be reattached and the hardware installed.
Before starting the application of the new coating, it’s a good idea to wipe down all surfaces to remove any dust or debris. It’s also a good time to replace the old hinges and knobs. If the cabinets have a shiny, glossy finish, they should be washed with a deglosser.
Then, the cabinet boxes should be sanded down to ensure that they’re smooth and ready for the new coating. Any holes or cracks should be filled with wood filler and sanded down again. After sanding, the cabinet boxes should be wiped down with a damp cloth to remove any dust or dirt before proceeding to paint.
If you’re planning on staining your cabinets, it’s a good idea to lightly sand the cabinet doors with 80-grit sandpaper before applying the stain. This will help the stain to absorb better and give a more even color throughout the surface of the cabinet.
A clear coat can be applied after staining to protect the wood from moisture and other stains. Most clear coats can be applied with a paintbrush or soft rag, and they should be lightly rubbed over the surface of the cabinets to create a smooth, even texture.
What Does a Plumber Do?
Plumber The Woodlands install and repair pipes, fixtures, and appliances that facilitate water distribution and waste removal in buildings. They typically complete an apprenticeship program that includes both classroom learning and on-the-job training.
They are often called on to work in confined spaces and must be comfortable working with tools and machines. The job also requires critical thinking skills and the ability to weigh options for addressing problems.
The job duties of a plumber include installing, repairing, and maintaining plumbing fixtures and appliances. They also interpret building codes and regulations, prepare work cost estimates, and obtain permits. In addition, they inspect piping, tanks, boilers, pumps, water heaters, and sewage systems to diagnose problems. Plumbers are also responsible for customer service, including addressing complaints, scheduling appointments and providing advice on plumbing solutions.
Plumbers use hand and power tools to install, replace and repair piping, faucets, drains, sinks, toilets and other components of plumbing systems. They may also need to work with electrical systems in some situations. Plumbers must be able to read blueprints and plans to understand the layout of pipe systems and the location of equipment. They must also be able to follow safety and quality standards when using chemicals and other materials.
They also need to have excellent communication skills, as they will often interact with customers to explain the problem and its cause. This will help them suggest the best solution and ensure that the client is satisfied with the final results. Plumbers also need to be physically fit to lift heavy objects and climb ladders in tight spaces.
Plumbing services are often required at inconvenient times, so plumbers must be available to respond to calls at any time of the day or night. This can require them to work overtime, which can be challenging when trying to balance family life and other responsibilities.
Plumbers also need to be able to adapt to changing conditions and circumstances. For example, if they are working on a large construction project, they may need to work with different teams in order to meet deadlines. Additionally, they might need to adjust their work schedule if there is an emergency situation, such as when a pipe bursts and floods the basement.
Plumbers also need to stay up-to-date on new plumbing techniques and equipment. This is because the industry is constantly evolving, and plumbers must be able to adapt to changes in technology and regulations.
Education and Training Requirements
Plumbers are the trade workers homeowners or building managers go to for standard plumbing services like unclogging pipes and drains, repairing toilets and fixing sinks. They are also called upon to handle emergencies like burst water lines and flooded kitchens. Plumbers are required to have excellent customer service skills and to be able to communicate effectively in order to explain their work to customers. They also need to have physical strength and be able to lift heavy equipment and tools.
The education and training requirements for a plumber vary by state or locality, but generally a high school diploma or GED is required. Some plumbers attend a vocational school to take courses in pipe system design, safety and tool use. Others complete an apprenticeship program to learn the trade. These programs usually last 4-5 years. Apprentices train under a journey plumber and often spend time cutting holes in walls and floors, learning to solder and how to read blueprints. Those who want to become licensed plumbers must pass a background check and have signed affidavits from master plumbers who can attest to their training and experience.
For those who do not want to pursue an education or apprenticeship, online courses are available to teach the basics of plumbing. Several companies offer these courses, including Ashworth College and the National Plumbing Association. These programs are designed by active professional plumbers, so you know that you’re getting the latest information and techniques. Unlike some other online programs, these courses are DEAC accredited and provide a legitimate credential.
The average salary for a plumber is $35,000. There are many factors that can influence this figure, including the level of experience and training, the area of specialization, and the demand for plumbing services in a particular area. It is important for plumbers to keep up with their training and certifications in order to stay competitive. This is especially true because technology in the field is rapidly changing. As a result, plumbers must be able to adapt quickly and efficiently in order to meet the needs of their clients.
Work Environment
The work environment for a plumber is hands-on and physically demanding. Plumbers spend their time in tight spaces and with tools that can cause musculoskeletal problems when not used properly. They also have to be on call for emergencies, so they may have to work odd hours.
Plumbing professionals use a wide range of skills to install, repair and maintain plumbing systems in homes, businesses and industrial buildings. They often interpret blueprints and construction plans to determine the location and layout of pipes, fixtures and appliances. They must also have excellent problem-solving skills to assess and resolve issues quickly, especially in high-pressure situations.
Because plumbers deal with hazardous materials, they need to follow strict health and safety guidelines when handling them. For example, they should wear gloves and protective eyewear when handling chemicals or sewage waste. They should also be aware of the risks associated with working at heights or on scaffolding. Plumbers should also avoid contact with biohazards such as raw sewage and infectious waste.
Plumbing professionals also need to have good communication skills because they must be able to explain technical information in an understandable way for customers. This includes being able to answer questions about the cost of parts and labor, as well as how to prevent future problems. They should also be able to respond quickly to customer inquiries, as the quality of their service can affect their reputation.
A career as a plumber can be very rewarding, but it’s important to choose the right path. To start, look for an apprenticeship program that offers a mix of classroom learning and on-the-job experience. If possible, try to get a mentor who can guide you through the process. In addition, you can join the PHCCA to gain access to professional resources and networking opportunities.
The plumbing industry plays a vital role in society. Without it, we would not have access to clean water or drainage systems to safely eliminate wastewater. The job is a great choice for people who enjoy working with their hands and like to solve complex problems. It is also a good choice for people who are looking for a more stable career than office work.
Salary
A plumber salary depends on several factors, including the state in which they live and the demand for plumbing services. It’s also possible for plumbers to earn more money by getting a promotion or starting their own plumbing company.
Most plumbers work full time and often have a set schedule. However, during peak times of the year, it is not uncommon for plumbers to have to work overtime. This is especially true for those who work in commercial construction.
The average annual salary for a plumber is $52,591, but this figure can vary significantly depending on state, experience, and other qualifications. For example, a plumber who has earned an advanced degree may be able to command a higher salary than someone with fewer years of experience. In addition, a Master Plumber who oversees other plumbers will likely make more than a journeyman plumber.
Plumbers can work in a variety of settings, including home, office, and construction sites. In the office, plumbers may help to design plumbing systems for new buildings or renovation projects. This can involve creating blueprints, laying out piping, and installing fixtures and appliances. Plumbers can also find jobs in construction sites, where they work alongside other skilled tradespeople such as carpenters and electricians.
Regardless of where they work, plumbers must be able to follow building regulations and safety protocols. They must also be able to identify and repair any issues with a building’s plumbing system. It’s important for plumbers to keep up with the latest developments in the plumbing industry, as outdated equipment can cause problems and even lead to leaks.
In order to stay competitive, a plumber must have a reliable and professional work ethic. This means being punctual, communicating effectively with clients, and following all relevant building codes. In addition, it’s crucial that a plumber has strong customer service skills, as this is the best way to attract and retain clients.
A plumbing company should offer a competitive pay rate to attract and retain the best plumbers. This can be done by listing a plumber’s hourly or annual salary on their job postings. In addition, a plumbing company can reward employees with goal-based bonuses that are tied to performance goals. These bonuses can greatly incentivize plumbers to work hard and improve their overall performance.
What You Need to Know About Driveway Paving
When it comes to paving your driveway, choosing the right material is essential. You also need to know what other factors impact the cost and longevity of your driveway installation.
For example, if someone knocks on your door and offers to pave your driveway for a low price, think twice! It’s likely that their asphalt will not last, and they won’t do the necessary preparation work to ensure a quality job. For professional help, contact Paving Company Charleston SC.
There are several factors that determine the cost of driveway paving. The most important is the material used. Other considerations include the size of the driveway, its shape, and its location. In addition, the type of landscaping around a driveway may affect the overall price. For example, a sloped or irregularly shaped driveway will require more excavation and grading work than a straight, flat driveway. Additionally, any driveway paving project should include the cost of site preparation and drainage systems.
Paving contractors typically charge per square foot, with the total cost of a two-car driveway running to about $3,200. Various materials can be used for driveways, but concrete and asphalt are the most common. They are durable and long-lasting, especially when properly maintained. Whether to use these materials or opt for a gravel alternative depends on the homeowner’s needs and budget.
Choosing the right driveway material is essential to the longevity of your new driveway. While a poured concrete driveway can be expensive, it has the advantage of lasting for decades. It can also be customized with colored or stamped patterns and borders. On the other hand, asphalt is an economical choice for homeowners in warm climates, and it lasts about 15 to 20 years before it requires a facelift.
Gravel is another popular option for driveways, especially in rural areas. It is an eco-friendly material that allows excess water to percolate back into the groundwater supply. However, it is more susceptible to erosion and can wash away with heavy rains.
A professional paving contractor can help you decide what kind of pavement is best for your home and your budget. They can explain the pros and cons of each option and give you an estimate of how much it will cost. They will also provide you with a detailed blueprint of the area to be paved. A slight blunder on the blueprint can mean thousands of dollars in unnecessary costs later on, so it’s best to consult a professional.
It’s important to consider the cost of the driveway paving project before hiring a contractor. The cost of a paved driveway varies depending on the material, the installation process, and the type of equipment required to install it. The price for asphalt is typically determined by the oil market, so it’s not always predictable.
Durability
Durability is a big consideration when choosing driveway paving materials. Homeowners can choose from several different types of pavers, including cobblestone, brick, and precast concrete. Each type of paver has its own unique benefits. For example, cobblestone is extremely durable and can last for more than a century. It can also be used to create a non-slip surface. However, this material can be expensive and difficult to work with. Moreover, it is important to consider the drainage on your property before choosing any paving material.
Asphalt is the most common paving material for driveways, but it does not last as long as other materials. However, it is less expensive than concrete and easier to install. It can also be recycled, making it an environmentally friendly option.
Concrete is a very durable option for driveways, and it can last homeowners 30 years or more with proper maintenance. It is also less prone to cracking than asphalt, and it can be repaired more easily. However, it is best to hire a professional to ensure that the installation is done correctly.
Pavers are an attractive choice for driveways, and they can add curb appeal to your home. They are available in a variety of colors and sizes, so you can choose the ones that best match your design. In addition, pavers can be interlocked, which allows them to be installed quickly. They are also easy to replace if one is damaged.
When choosing a contractor for your driveway paving project, make sure that they are certified and have a good reputation. You should also ask them to provide you with references from previous clients. Ideally, you should go with a company that offers a complete package, which includes excavation, base preparation, and compaction of the pavement. In addition, the contractor should properly slope and grade the driveway to prevent erosion and water runoff.
It is a good idea to keep in mind that it takes at least three days for the new pavement to dry before traffic can be allowed on it. It is also a good idea to maintain your driveway by regularly sweeping it, washing away debris that could damage the surface, and filling cracks before they get too large. In addition, it is a good idea to seal your driveway once every two years to prevent oxidation and deterioration.
Maintenance
When a driveway is newly paved, it’s important to keep up with regular maintenance in order to ensure that the surface remains as attractive and functional as possible. This includes completing regular cleaning tasks and keeping the surface free of weeds and moss. If you neglect these tasks, the paving will become stained and unsightly over time and may even need to be replaced.
To keep a paved surface in the best condition, scrubbing with clean water, either cold or hot, is recommended. This will help to remove greasy marks and oil spills from the surface of the paving slabs. Vigorous scrubbing, however, is not a good idea as it can damage the paving blocks and leave lasting scratches. It’s also important to avoid using acid-based products, which can cause etching of the paving slabs and pose a serious health and safety risk.
If you do choose to use an acid-based cleaner, it’s important to follow the manufacturer’s instructions to ensure that you don’t exceed the maximum dilution rate. For this reason, it’s usually a better option to hire a professional paving contractor who can recommend the right product for your driveway paving project.
Asphalt is another popular choice for driveway paving. It’s inexpensive to pour and is able to withstand heavy traffic without cracking or breaking. It’s also suitable for different weather conditions, including extreme temperatures, and is more resistant to salt than concrete.
While asphalt driveways are relatively low-maintenance, they should be sealed twice a year in order to maintain their durability and beauty. The sealant is available in a variety of colors and can be applied by hand or with a sprayer. In addition to protecting the driveway from damage, it also prevents stains and water from seeping under the surface of the asphalt, which can cause the pavement to crack over time.
To prevent weeds and moss from growing in your paved area, make sure that the soil underneath the surface of the paving is compacted to provide a solid base for the pavers. Also, consider installing a screen to discourage weed growth. Finally, spread and compact a layer of paver base material (typically a 6-inch layer of washed, crushed stone) over the top of the subgrade.
Appearance
Paving your driveway will not only improve the appearance of your home but also boost its value. Homebuyers are often very picky about small details, so the right paving technique can make your property stand out from the competition. Moreover, a well-kept asphalt driveway has a smooth appearance that is highly appealing to most buyers. In addition to enhancing your home’s curb appeal, driveway paving can help you get rid of the need for manual mowing, which can save you time and money.
However, it’s important to remember that not all paving contractors are equal. You need to choose a company that will work closely with you and provide you with valuable paving advice. Less experienced contractors will not have the ability to offer design advice that takes into account traffic flow and the daily usage of your driveway.
In terms of paving material, concrete is a more popular choice than asphalt. This is because it offers more color options and flexibility in the overall look of your driveway. It is possible to tint, etch, and stain concrete; however, these techniques aren’t as effective with asphalt. This is because asphalt dries very quickly, so these processes have to be done quickly to prevent damage.
When choosing a stone paver driveway, it’s important to consider the style of your home. You should try to find a style that will complement your home’s architecture and fit into the surrounding landscape. One option is to use natural cobblestones, which will match a rustic aesthetic. Other good choices include Filetti pavers, which are traditional throughout Europe and feature a long, thin format that works well with modern and traditional architecture. Porphyry split stones are another ideal option for a driveway, as they’re extremely dense and hard-wearing.
When it comes to resurfacing your driveway, you should use a quality asphalt mix with low air voids and a refined aggregate finish. This will allow the pavement to last longer and resist weathering and oxidation. In addition, the pavement should be properly sealed to protect against water damage. It’s also important to install a drainage system for your driveway so that water does not accumulate on the surface and cause cracking, rutting, and erosion.