Home » Posts tagged 'cabinet refacing'
Tag Archives: cabinet refacing
Cabinet Refinishing – The Easy Way to Spruce Up Your Cabinets
San Jose Cabinet Refinishing involves changing the color of your cabinets using stain or paint without removing anything. This is ideal for addressing scratches, dents, and faded colors while using the existing cabinets.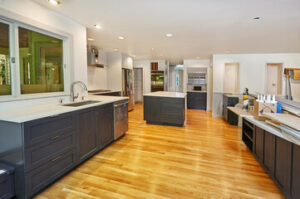
Typically, a light sanding is required between all coats. Please note that this process is impractical for thermofoil or laminate doors and drawer fronts.
Painting is one of the easiest ways to spruce up cabinetry, and refinishing can save you money compared to the cost of new cabinets. However, many details go into a professional cabinet painting job. First, the cabinets must be thoroughly cleaned to remove grease and oils that prevent a smooth finish. A good cleaning starts with a quick spray with an ordinary degreaser solution, followed by a wipe-down with a damp cloth. If the kitchen is especially dirty, you may need to use a more robust cleaner such as trisodium phosphate (TSP), available at hardware and paint stores. TSP works by emulsifying grease, so it is easily rinsed away with water.
After cleaning, a professional cabinet painter will scuff sand the surface of the wood to create a smooth profile before applying a quality primer. This is an important step that should not be skipped to save time or money. An experienced cabinet painter will also fill holes and dents before priming to ensure that the primer sticks well.
Once the primer has dried, it is ready to be painted and a professional will apply two coats to provide a consistent color with no thin or light spots. This technique is called “tipping off” and it is done by brushing the wet paint over a dry section of the previous coat to eliminate any noticeable line where the two colors meet.
It is a good idea to have a professional painter do your cabinet refinishing because it can be very easy to make mistakes that could cause the finished product to look less than perfect. Some examples include not sanding between coats, using the wrong type of paint for the job, and missing steps in the prepping process.
If you choose to do the refinishing yourself, be sure to take your time and do it correctly. You will be rewarded with a beautiful new kitchen and the best return on your investment is when you do things right the first time.
Keep in mind that cabinet refinishing does not allow you to change the style of the doors, so be sure you are happy with their current profile. Otherwise you will need to reface them instead.
Stain
Stain brings out the character of natural wood by showcasing its unique grain patterns and warm colors. It soaks into the wood, rather than sitting on top of it, giving it a rich look that fits design styles from traditional to contemporary. With stain, it’s usually easier to find touch-up markers than paint.
Cabinet stain requires a bit more prep than painting. You’ll need to remove the doors and drawer fronts (and hardware), then thoroughly wash them and their hinges with trisodium phosphate, or TSP, diluted according to manufacturer specifications. You’ll also need to sand the cabinets, then wash again. TSP can corrode metal hardware and damage finished surfaces, so you’ll need to mask them if necessary.
You can stain your cabinets while they’re still in place, but it will take longer. To do so, you’ll need to remove any exposed sides of the cabinets, and use a screwdriver to unscrew the cabinet door hinges from the cabinet box and set them aside. You’ll also want to lightly sand the cabinets, then wipe them down with tack cloth to remove dust and grease.
Once the sanding and cleaning are complete, you can start the staining process. Be sure to follow the product’s instructions for application, as well as the specific type of stain you’re using. For example, some woods can absorb multiple coats of stain, while others require only a single coat. You’ll also need to decide how long you leave the stain on before wiping it. Leaving it on longer will result in a darker color, while wiping it off sooner will make the color lighter.
Unlike painted cabinets, stained ones don’t hide dirt and dust as well. They’ll need to be wiped down more frequently, but the stains will add character and charm to your kitchen that you just can’t get from painted cabinets.
If your cabinets are dark now, it will probably be harder to lighten them than it is to make them lighter, as the existing finish might need chemical stripping or lots of sanding to get rid of it. In this case, it might be best to hire professionals to do the job.
Glaze
Glaze is a finish that can be used to enhance the appearance of your cabinets. When applied properly, it can provide a subtle shading effect over the surface or highlight grooves and fluting on cabinet doors and drawer fronts. It’s also an excellent choice for creating the impression of age and a weathered look. The color of glaze can be adjusted to create warm or cool tones, adding depth and enhancing the architectural details of your cabinets.
Unlike stain, glaze is thicker in consistency, allowing you to control the application. You can use a glaze over both painted and stained surfaces. It can be applied with a brush, rag or foam roller. If you choose to use a glaze on your cabinets, it’s best to seal them first so that the glaze doesn’t absorb into the wood and ruin the look of the cabinetry.
You can find pre-mixed glazes that are ready to apply or you can mix a glaze with paint, japan colors or universal tinting products to get a more customized tint. Whatever you choose, be sure to run a test sample before applying to the rest of your project. Oil-based glazes dry faster than water-based so they can be more forgiving to work with.
When choosing a glaze, be sure to ask your kitchen design specialist for advice and examples. They can help you select a color that will be the right match for your style and cabinetry materials.
You can add a clear topcoat over the glaze when it’s dry to protect the surface and keep it looking fresh. It’s best to wait until the glaze is dry before adding a sealer, however, as using a topcoat on a wet glaze can lift it off the surface and leave your cabinets with a dull, scratched finish. Some people choose to use a matte clear coat on their cabinets, which has a lower gloss level and is less susceptible to dirt build-up or scratching. Some people find that this type of finish feels more classic and timeless than glossy paint.
Brush Coat
The last step in the cabinet refinishing process is to apply one or more coats of paint. This gives the cabinets a fresh, new look and helps protect them from water and other stains. Cabinet painting requires precision to achieve a clean, even finish. Using a brush makes this more difficult, so the painter must be extra careful to create straight lines and cover large areas evenly.
Unlike spray paint, which must be thinned down to create a fine mist, brushes are great for any viscosity of paint. This means that painters can use thicker paint for better durability and coverage on the surface of the cabinets. However, this can also lead to sloppy applications that can leave behind visible brush marks or drips on the surface of the cabinets.
After applying the final coat of paint, it’s important to let it dry for a few hours. This gives the cabinet a chance to fully cure and makes it safe for normal usage. Then, the cabinet doors can be reattached and the hardware installed.
Before starting the application of the new coating, it’s a good idea to wipe down all surfaces to remove any dust or debris. It’s also a good time to replace the old hinges and knobs. If the cabinets have a shiny, glossy finish, they should be washed with a deglosser.
Then, the cabinet boxes should be sanded down to ensure that they’re smooth and ready for the new coating. Any holes or cracks should be filled with wood filler and sanded down again. After sanding, the cabinet boxes should be wiped down with a damp cloth to remove any dust or dirt before proceeding to paint.
If you’re planning on staining your cabinets, it’s a good idea to lightly sand the cabinet doors with 80-grit sandpaper before applying the stain. This will help the stain to absorb better and give a more even color throughout the surface of the cabinet.
A clear coat can be applied after staining to protect the wood from moisture and other stains. Most clear coats can be applied with a paintbrush or soft rag, and they should be lightly rubbed over the surface of the cabinets to create a smooth, even texture.
How to Choose the Right Flooring for Your Home
If you’re planning to replace your flooring, consider your budget first. Then consider style and installation options, such as whether or not you’ll be able to lay the new floor on a DIY basis.
Tile floors are easy to maintain and can be laid in a variety of patterns and colors. They are also slip-resistant and won’t harbor mildew. Click https://thompsonandboys.com/ for more details.
One of the most traditional flooring materials, hardwood floors add natural beauty and value to your home. Hardwood floors come in a wide range of styles, finishes, and colors that complement many decor choices. Wood is a natural choice for floors and is durable, naturally renewable, and easy to clean.
There are two types of wood flooring: solid and engineered. Solid wood floors are made from planks that are milled from a single piece of timber. The timber is kiln or air dried before it’s sawed into the desired sizes and shapes for your floor. The solid wood can then be finished at the factory, or it can be installed “unfinished” and finished later on site.
Solid wood flooring is usually more expensive than engineered wood floors, but it’s important to consider the cost of installation as well. You will also pay for the extra labor to stain or finish your wood flooring after it is installed.
The best hardwood floors are made from species that are naturally durable. Oak, maple and cherry are among the most popular hardwood options. More exotic species of wood such as hickory, brazilian cherry and mahogany are also available, but they tend to be more costly than domestic hardwoods.
When comparing the durability of different species of wood, you should also consider the Janka scale (a rating system used to determine how hard a particular hardwood is). The harder a wood is, the higher it will rank on the scale.
Most varieties of hardwood can be refinished a number of times. Refinishing involves sanding the surface of the floor to remove dents and scratches, then applying a new coat of stain or paint. It’s important to use a quality stain or paint, and the finish should be water resistant to help protect the floor from moisture damage.
The thickness of the hardwood veneer is also a factor in the price and durability of your hardwood flooring. A thicker layer of veneer is more expensive, but it can be refinished more times, potentially adding decades to the lifespan of your hardwood floor.
Tile
Tile is a durable flooring option that can hold up to the heavy foot traffic and humidity of living rooms and kitchens. The durability of tile means that it is also well suited for children’s play areas and can handle the occasional mud or pet mess. With a wide variety of styles, colors and textures available, tile can add a luxurious touch to any room.
Tile floors can be as sleek and modern as a marble countertop or as rustic as a wood-look floor with the added benefit of being easy to clean, slip-resistant and stain-proof. The varying colors and styles of tile flooring allow homeowners to create the unique look they want for their homes, with options from a linen-textured sage green to a rich blue hue or a metallic sheen.
When laying a new tile floor, the first step is to prepare the area by applying a layer of backer board that must be dry and free of any cracks or chips. After the backer board is down, the tiles are laid with thin-set mortar. Thin-set is available in a range of formulations, from traditional cement mixed with pigment to latex formulas. Each type handles a different aspect of the installation, so it is important to use the type recommended by the tile manufacturer.
There are three basic types of tile: porcelain, ceramic and stone. Porcelain tiles are manufactured from denser clay and fired at a higher temperature than ceramic tiles, which makes them more durable. Ceramic tiles are glazed, making them easy to clean and offering a range of color and design choices. Stone tiles can be glazed or unglazed and come in a number of varying hues and textures, from the smooth sheen of granite to the textured surface of onyx.
When it comes to tiling, the most common method is to lay out the first four tiles around the center of the room with spacers between them. This will ensure that all the tiles will be evenly aligned and placed properly as they are installed. Once the tiles are set, the remaining mortar should be allowed to harden before grouting. It is important not to add water to the tiles or mortar once it starts to harden, as this will weaken the bond and affect how well the tiles will stand up over time.
Vinyl
When some people hear the word “vinyl” they think of the sheet/roll flooring their Mom used to have in their kitchen or the stick down tiles they put down in college. While modern vinyl flooring does not look anything like the sheets and tiles of the past, it is still a synthetic option designed to mimic natural materials at a typically lower price point.
Sheet vinyl is made of a plastic known as polyvinyl chloride (PVC) and contains additives such as stabilizers, lubricants, fillers and pigments to improve durability and function. The chemicals in PVC are a concern as they can release volatile organic compounds during manufacturing, which can then leach into the environment or cause harm to human health when inhaled or ingested. Some of these volatile organic compounds are carcinogenic or cause other health problems when absorbed into the body.
Vinyl is also a non-sustainable option for flooring as it uses large amounts of natural resources such as oil and wood. In addition, the production of vinyl is energy intensive and emits greenhouse gases. While many manufacturers offer low-VOC versions of this type of flooring, ventilation is often not effective in reducing levels of VOCs to acceptable limits.
Luxury vinyl plank, abbreviated as LVP, is a relatively new floor covering option that seeks to imitate the appearance of natural flooring options such as wood and tile. Most LVP products are sold in plank format to imitate wood or tile flooring, but some are available in a sheet style to imitate stone flooring. LVP is more durable than traditional vinyl and can be installed in areas of the home that require moisture resistance, such as bathrooms and laundry rooms.
In addition to being more durable and waterproof than most laminate flooring, LVT is also easy to clean and maintain. This type of flooring can be mopped or vacuumed with a high-efficiency particulate air (HEPA) filter, which significantly reduces the amount of dirt and allergens that is released into the environment. While it is not as environmentally friendly as reclaimed hardwood or recycled content laminate, this type of flooring is a good choice for homeowners who want to minimize their environmental impact.
Carpet
Carpet is a popular flooring option that adds warmth and comfort to any room. It offers a range of benefits including noise reduction, thermal resistance, and stain resistance. However, it is important to remember that carpet does require more maintenance than other flooring options like hardwood and tile.
When selecting a carpet for your home, it is important to consider the fiber type, face weight, twist (if applicable), and pile density. A quality carpet should have a minimum face weight of 34-40 ounces and a twist level of 5 or more. It is also important to choose a durable pad underlayment that will extend the life of your carpet.
A carpet’s thickness helps reduce the impact of footfalls and furniture dings on the floor. This will keep your floors looking new for longer, and it can also help to save energy.
Additionally, carpets provide an excellent acoustic barrier to the sound from your footsteps, which can make rooms in your home quieter. This can be especially helpful in reducing noise pollution from loud televisions or computer speakers, as well as noise that can travel between rooms in your home.
Another benefit of choosing carpet for your home is that it can reduce the levels of volatile organic compounds (VOCs) in the air. These are harmful gases that can cause health problems, so it’s important to look for low-VOC carpet flooring if you want to protect your family’s health.
Allergens like mildew and dust mites thrive on carpet, so if you suffer from respiratory or allergy issues, you may want to opt for a harder flooring material like hardwood or tile instead of carpet. However, you can find plenty of carpets that are hypoallergenic and low-VOC to ensure a comfortable and healthy living space for all of your family members.
Although carpet is a great choice for many rooms in your home, it’s not recommended for high-traffic areas, as it tends to wear out and show dirt more easily than other flooring materials. It’s also important to regularly vacuum and clean your carpet to ensure that it stays fresh and free of stains.