Home » Posts tagged 'interior painting'
Tag Archives: interior painting
Cabinet Refinishing – A Great Option For Homeowners Looking to Modernize Their Kitchen Without Breaking the Bank
Cabinet Refinishing Modesto Anchor is a great option for homeowners looking to modernize their kitchen without breaking the bank. It also contributes to less waste by reusing material that would otherwise be thrown away.
Replacing cabinets is a time-consuming process that involves demolition and potential structural changes. It can also feel out of reach for many homeowners.
Refinishing and painting cabinets is one of the best ways to transform the look of your kitchen without a full renovation. But, before you reach for the paintbrush and begin your project, it’s important to understand the importance of a good primer. The right primer can make all the difference between a durable finish that lasts and a chipped, peeling mess.
There are a number of different types of primers, each designed for specific surfaces and purposes. For example, a bonding primer is ideal for glossy surfaces, while an oil-based primer works well on stained or wooden cabinets to prevent bleed through. In addition, there are a variety of tinted primers available that can help reduce the amount of finishing paint needed to achieve an even color.
The process of priming is also crucial to ensuring that your finished product will last. The primer helps to create a strong, even base that the topcoat will adhere to, and it also protects the surface from moisture and other damage. This is especially important with cabinets, which are often subject to daily wear and tear.
Primer is also helpful in preventing the “fisheye” effect that can occur when light colors are painted over darker ones. By filling in the small pores and crevices of the cabinet surface, the primer helps to ensure that the final color will be evenly distributed across the entire cabinet.
As with any paint job, the first step in applying primer is to thoroughly clean the cabinets. This should be done using a degreaser, such as Krud Kutter or TSP (trisodium phosphate). Any dirt, grease, or other grime will prevent the primer and paint from adhering properly to the surface. It’s also important to sand the cabinets before applying the primer. This will roughen the surface and provide a more even texture for the primer to stick to. After sanding, it’s a good idea to wipe down the surface with a damp cloth to remove any residual dust.
Primer is an essential part of any painting project, but it’s especially important for cabinet refinishing. It’s easy to skip this step and go straight to painting, but the results will not last. Investing the time and energy into a quality primer will pay off in the long run by ensuring that your finished product looks great for years to come.
Repair
When you’re refinishing cabinets, you keep the existing materials but apply a new finish to them. It can be a fresh coat of paint, but it’s often a stain. This is an option for homeowners who want to update their cabinets but don’t need something as dramatic as a full replacement.
To prepare for refinishing, you’ll need to strip the old finish and sand the cabinets to remove any dirt or marks. You’ll also need to repair any areas of damage like holes or scratches. You can patch these up with wood filler, sand and then prime. A good primer is important because it helps the paint bond to the wood and prevents moisture from damaging the surface.
During the refinishing process, you’ll usually use a chemical stripper to get rid of the old paint. This can be messy and time consuming, so it’s important to use the right safety equipment like gloves and long sleeves. It can also take some elbow grease to scrape off all of the layers, so you’ll need a lot of patience. Once you’ve stripped the cabinets, you can start to sand them and prep them for painting.
Before you paint, you’ll need to sand the cabinets again to ensure there are no imperfections. You can use a sander or a hand-held sanding block to do this. Once you’ve sanded, you can apply the first coat of paint and let it dry. Then, you’ll need to sand again and apply the second coat of paint. After the second coat dries, you can install the cabinets again.
Refacing cabinets is similar to refinishing in that you’ll be keeping the existing cabinet boxes and changing the doors and drawer fronts. However, refacing is a bit more extensive than refinishing since you’ll be replacing the fronts with new ones.
Cabinet refacing can be an excellent choice if you’re in need of a major kitchen makeover, but you don’t have the budget for replacement cabinets. Refacing, refinishing and repairing are all cost-effective options that save you money over completely replacing your cabinets.
Sanding
Cabinet refinishing is a more cost-friendly option than replacing cabinets. It allows homeowners to change the color of their cabinets without having to invest in a new set. However, it doesn’t have the transformative power of refacing. If you’re looking for a more dramatic change, consider refacing your cabinets.
Before starting the refinishing process, you should repair any cracks, dents or gouges with wood filler and sand the surface. It’s important to use a fine grade sandpaper for best results. Once the surface is completely dry, you can begin painting. Make sure to use two coats of paint for a more durable finish. Once the first coat dries, sand lightly and wipe down with a damp cloth.
If you’re planning on staining your cabinets, the same process applies as with paint. You’ll need to remove any existing topcoat and sand the surface to create a smooth finish. After the surface is sanded, you can patch any holes or dents with wood filler and sand again before applying the new finish. It’s also important to choose a quality stain, such as gel stain, so that it won’t peel or bubble.
While you’re sanding, make sure to check the progress regularly and replace your sandpaper as needed. Start with a coarse grit and work your way up to the finer grits for a smooth and flawless finish. Don’t skip grits, as this can cause damage to the surface of your cabinet.
Before you start sanding, protect your workspace with drop cloths and wear safety gear, such as eye protection and gloves. Once your work area is protected, clean the cabinet surfaces with a wood cleaner such as trisodium phosphate (TSP). This will remove any remaining residue from previous finishes and ensure that the new surface is ready for staining.
If you don’t have any nicks or scratches to repair, you can skip the sanding step and move directly to staining. Alternatively, you can use a liquid deglosser on your cabinets to roughen up the surface and help the stain adhere. This product is flammable, so be sure to work in a well-ventilated area. It’s also important to test your stain color on some scrap wood or a piece of your cabinet before you apply it to the entire surface.
Painting
Cabinet painting is a big job and requires more than just brushing on a coat of your new color. It involves a lot of prep work including cleaning, sanding, repairing and priming, and then applying multiple coats of paint and waiting for them to dry. When done poorly, the result can be unsightly and damage your cabinets.
When you’re painting your cabinets, be sure to start with a clean canvas and remove everything from the cabinet interiors, including drawers. You should also be careful not to damage your cabinet hardware, which can sometimes be difficult to replace. It’s a good idea to label your cabinet doors and drawer fronts as you take them off, so that when you reinstall them they’re back in the right place.
Once the surfaces are cleaned and sanded, you can begin painting your cabinet doors and drawer fronts. Be sure to apply a primer such as BEHR PREMIUM Multi-Surface Stain-Blocking Primer & Sealer or KILZ 2(r) All-Purpose Primer. This will help your finish last longer and give it better adhesion. Depending on the condition of your cabinetry, you may need to do several coats of paint to achieve a consistent and even look. It’s a good idea to lightly sand between each coat and wipe away any dust before applying the next one.
After the final coat of cabinet paint has been applied and allowed to dry, you can add some touch-ups as needed and install your cabinets back into the kitchen. It’s a good idea to replace the cabinet hardware once you’re finished, as this can make a huge difference in the overall look of your space.
Painting your cabinets can save you a lot of money and be an excellent DIY project. But if you aren’t careful, you can end up damaging your cabinets and reducing their lifespan. To avoid this, be sure to follow the tips above and use a professional who can handle all the prep and painting for you.
Cabinet Refinishing – The Easy Way to Spruce Up Your Cabinets
San Jose Cabinet Refinishing involves changing the color of your cabinets using stain or paint without removing anything. This is ideal for addressing scratches, dents, and faded colors while using the existing cabinets.
Typically, a light sanding is required between all coats. Please note that this process is impractical for thermofoil or laminate doors and drawer fronts.
Painting is one of the easiest ways to spruce up cabinetry, and refinishing can save you money compared to the cost of new cabinets. However, many details go into a professional cabinet painting job. First, the cabinets must be thoroughly cleaned to remove grease and oils that prevent a smooth finish. A good cleaning starts with a quick spray with an ordinary degreaser solution, followed by a wipe-down with a damp cloth. If the kitchen is especially dirty, you may need to use a more robust cleaner such as trisodium phosphate (TSP), available at hardware and paint stores. TSP works by emulsifying grease, so it is easily rinsed away with water.
After cleaning, a professional cabinet painter will scuff sand the surface of the wood to create a smooth profile before applying a quality primer. This is an important step that should not be skipped to save time or money. An experienced cabinet painter will also fill holes and dents before priming to ensure that the primer sticks well.
Once the primer has dried, it is ready to be painted and a professional will apply two coats to provide a consistent color with no thin or light spots. This technique is called “tipping off” and it is done by brushing the wet paint over a dry section of the previous coat to eliminate any noticeable line where the two colors meet.
It is a good idea to have a professional painter do your cabinet refinishing because it can be very easy to make mistakes that could cause the finished product to look less than perfect. Some examples include not sanding between coats, using the wrong type of paint for the job, and missing steps in the prepping process.
If you choose to do the refinishing yourself, be sure to take your time and do it correctly. You will be rewarded with a beautiful new kitchen and the best return on your investment is when you do things right the first time.
Keep in mind that cabinet refinishing does not allow you to change the style of the doors, so be sure you are happy with their current profile. Otherwise you will need to reface them instead.
Stain
Stain brings out the character of natural wood by showcasing its unique grain patterns and warm colors. It soaks into the wood, rather than sitting on top of it, giving it a rich look that fits design styles from traditional to contemporary. With stain, it’s usually easier to find touch-up markers than paint.
Cabinet stain requires a bit more prep than painting. You’ll need to remove the doors and drawer fronts (and hardware), then thoroughly wash them and their hinges with trisodium phosphate, or TSP, diluted according to manufacturer specifications. You’ll also need to sand the cabinets, then wash again. TSP can corrode metal hardware and damage finished surfaces, so you’ll need to mask them if necessary.
You can stain your cabinets while they’re still in place, but it will take longer. To do so, you’ll need to remove any exposed sides of the cabinets, and use a screwdriver to unscrew the cabinet door hinges from the cabinet box and set them aside. You’ll also want to lightly sand the cabinets, then wipe them down with tack cloth to remove dust and grease.
Once the sanding and cleaning are complete, you can start the staining process. Be sure to follow the product’s instructions for application, as well as the specific type of stain you’re using. For example, some woods can absorb multiple coats of stain, while others require only a single coat. You’ll also need to decide how long you leave the stain on before wiping it. Leaving it on longer will result in a darker color, while wiping it off sooner will make the color lighter.
Unlike painted cabinets, stained ones don’t hide dirt and dust as well. They’ll need to be wiped down more frequently, but the stains will add character and charm to your kitchen that you just can’t get from painted cabinets.
If your cabinets are dark now, it will probably be harder to lighten them than it is to make them lighter, as the existing finish might need chemical stripping or lots of sanding to get rid of it. In this case, it might be best to hire professionals to do the job.
Glaze
Glaze is a finish that can be used to enhance the appearance of your cabinets. When applied properly, it can provide a subtle shading effect over the surface or highlight grooves and fluting on cabinet doors and drawer fronts. It’s also an excellent choice for creating the impression of age and a weathered look. The color of glaze can be adjusted to create warm or cool tones, adding depth and enhancing the architectural details of your cabinets.
Unlike stain, glaze is thicker in consistency, allowing you to control the application. You can use a glaze over both painted and stained surfaces. It can be applied with a brush, rag or foam roller. If you choose to use a glaze on your cabinets, it’s best to seal them first so that the glaze doesn’t absorb into the wood and ruin the look of the cabinetry.
You can find pre-mixed glazes that are ready to apply or you can mix a glaze with paint, japan colors or universal tinting products to get a more customized tint. Whatever you choose, be sure to run a test sample before applying to the rest of your project. Oil-based glazes dry faster than water-based so they can be more forgiving to work with.
When choosing a glaze, be sure to ask your kitchen design specialist for advice and examples. They can help you select a color that will be the right match for your style and cabinetry materials.
You can add a clear topcoat over the glaze when it’s dry to protect the surface and keep it looking fresh. It’s best to wait until the glaze is dry before adding a sealer, however, as using a topcoat on a wet glaze can lift it off the surface and leave your cabinets with a dull, scratched finish. Some people choose to use a matte clear coat on their cabinets, which has a lower gloss level and is less susceptible to dirt build-up or scratching. Some people find that this type of finish feels more classic and timeless than glossy paint.
Brush Coat
The last step in the cabinet refinishing process is to apply one or more coats of paint. This gives the cabinets a fresh, new look and helps protect them from water and other stains. Cabinet painting requires precision to achieve a clean, even finish. Using a brush makes this more difficult, so the painter must be extra careful to create straight lines and cover large areas evenly.
Unlike spray paint, which must be thinned down to create a fine mist, brushes are great for any viscosity of paint. This means that painters can use thicker paint for better durability and coverage on the surface of the cabinets. However, this can also lead to sloppy applications that can leave behind visible brush marks or drips on the surface of the cabinets.
After applying the final coat of paint, it’s important to let it dry for a few hours. This gives the cabinet a chance to fully cure and makes it safe for normal usage. Then, the cabinet doors can be reattached and the hardware installed.
Before starting the application of the new coating, it’s a good idea to wipe down all surfaces to remove any dust or debris. It’s also a good time to replace the old hinges and knobs. If the cabinets have a shiny, glossy finish, they should be washed with a deglosser.
Then, the cabinet boxes should be sanded down to ensure that they’re smooth and ready for the new coating. Any holes or cracks should be filled with wood filler and sanded down again. After sanding, the cabinet boxes should be wiped down with a damp cloth to remove any dust or dirt before proceeding to paint.
If you’re planning on staining your cabinets, it’s a good idea to lightly sand the cabinet doors with 80-grit sandpaper before applying the stain. This will help the stain to absorb better and give a more even color throughout the surface of the cabinet.
A clear coat can be applied after staining to protect the wood from moisture and other stains. Most clear coats can be applied with a paintbrush or soft rag, and they should be lightly rubbed over the surface of the cabinets to create a smooth, even texture.
How to Estimate the Cost of a House Painter
Painting your house is a great way to add value and increase curb appeal. However, it can also be a tedious and time-consuming process.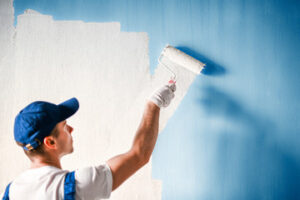
Hiring painter is an excellent option for homeowners who want to ensure their project is completed promptly. These professionals can provide many benefits to your home.
When it comes to estimating a house painting job, many things need to be taken into consideration. These factors include surface preparation, paint, and other materials. They also need to consider the time frame and labor cost. Getting a detailed estimate is the first step to getting the job done right.
When preparing an estimate for a paint job, it is important to take the time to walk the home with the client and identify all areas that need work. This will help them understand what needs to be done and why. In addition, the contractor will be able to determine the best type of paint for the job. This will ensure that the paint adheres to the surface and is long-lasting.
A painter’s estimate will usually include the total project cost, including the paint and materials, as well as overhead and profit margin. It will also include a projected completion date. This will give the homeowner a clear idea of what to expect and can help them make a decision about whether or not to go with the contractor.
Another thing that a painter will need to take into consideration when preparing an estimate is the location of the home. For example, if the walls are high, then it may be necessary to use a ladder or scaffolding. This will add to the overall cost of the project, so it is important to be honest with clients and to include these costs in the estimates.
Before a contract is signed, the homeowner should ask the contractor for proof of liability and workers’ compensation insurance. This is to protect them in case the painter or his crew gets injured or their personal property is damaged. The contract should also include a description of the painting job and a clear list of all charges.
A good painter will also be able to provide a written warranty on his work. This will cover any damage that occurs to the painting job within two years of completion. This will give the homeowner peace of mind that the painter is reputable and trustworthy.
They Can Help You With A Custom Design
Painting is one of the easiest ways to make over a room and change its look. A professional house painter can help with this process and ensure that it is done right. They can advise on the color schemes and what looks best with your furniture and decor. They also know what types of paint will work in various areas, such as outdoor and bathroom walls.
Most house painters have experience and are familiar with the latest trends. They can help you create a design that is both unique and stylish. Besides, they will have the knowledge and equipment needed to complete your project. Moreover, they are licensed and insured, which means that you can file a claim against them if something goes wrong during the job.
When hiring a house painter, it is important to find out if they are licensed and insured. This will protect you in case anything goes wrong during the painting process. Moreover, they will be able to provide you with a detailed estimate for the entire project. This will prevent any hidden costs from popping up later on.
Many homeowners turn to large house painting companies when they need a home painted. These businesses can be found through referrals, online searches, and local listings. They have a team of experienced house painters and can handle both exterior and interior projects.
Besides, they will be able to finish the project quickly and efficiently. They will be able to move in and out of the home, so they will not disrupt your daily routine. They will also be able to clean up the area and keep it organized while they are working on the project.
Getting a job as a house painter is not easy, but it is an excellent career choice for people who enjoy working with their hands and take pride in their work. It is also a physically demanding job, as it requires standing up and moving the upper body for long periods of time. Those who are interested in this career should consider attending networking events and trade shows to meet potential clients and build relationships with other business owners.
They Can Give You A Good Recommendation
A house painter is a professional who can decorate and renovate your home. They can do interior and exterior painting, along with other services such as wallpaper installation and repairs, drywall or plaster repair, caulking and even stucco and popcorn removal. They also can do custom jobs such as murals or faux paintings. They can help you choose the right color palette or design and can answer any questions you may have.
They can provide a detailed estimate before the project starts. This will include a description of the work to be done, a timeline and materials costs. You should always get multiple quotes from different painters to ensure that you are getting the best price and service. Moreover, you should know what their policy is if something gets damaged during the job. This will give you peace of mind that they will take care of any issues that might arise.
The painting contractor will typically work with you to establish a schedule for the job. They will work quickly and efficiently to complete the job. They will also do any necessary cleanup after the job is finished. This includes disposing of excess paint, removing drop cloths and plastic covers, and cleaning up any areas that were affected by the work. They will then do a walk-through with you to discuss any touch-ups that may be needed.
Many house painters have staff and crews that they can call on for larger projects. This will allow them to complete the job in a shorter amount of time and will help them stay on schedule. This means you will have your home back much sooner than if you did the job yourself.
If you’re looking for a house painter to do some work on your home, it’s important to find one who has a good reputation in the community and can provide references. You can also look for a website or social media page where you can read reviews and testimonials from past clients. In addition, make sure they have valid insurance and are registered to work in your area.
They Can Keep Your Home Clean
A house painter does a lot more than just slap on a fresh coat of paint. They also remove outlet covers, patch cracks, and apply putty and primer to prepare surfaces before painting. Some of these tasks can be messy, but a professional will take care of them and clean up afterward. This will save you time and effort and prevent the need for further cleanup.
In addition to their skills with a brush or roller, professional house painters have a keen eye for detail and can spot problems before they become a problem. This is important when working with expensive materials like paint. They will keep an eye out for mildew and mold, especially in bathrooms and kitchens. They may use special textured paint or anti-mold paint to help combat these issues before they grow out of control.
Many painters choose to remain non-union and run their business as a sole proprietorship or in small companies with a few employees. However, others prefer a union apprenticeship that leads to a career in commercial or residential painting. A high school diploma or GED certificate is usually required for these positions. Those who enjoy working with their hands and have strong upper body strength are ideal candidates for this type of work.
It is important to ask for a detailed estimate from any house painter you hire. This should include the cost of labor and materials, and a timeline for completion. It is also important to make sure they have valid insurance and customer testimonials/references. This will protect you in the event that workers get injured or personal property is damaged while doing the job.
When choosing a house painter, it is best to go with a company that has several years of experience in the industry. This will ensure they have the knowledge and skills to complete any project. In addition, they will be able to give you a thorough explanation of the process and answer any questions you may have. Also, be sure to look for a company that offers free estimates and is licensed and insured.
How to Get the Most Out of Interior Painting
Interior Painters Perth allows homeowners to change the mood and atmosphere of their homes. The right color choice can make rooms feel larger or smaller, brighter or cozier.
A professional will do a visual inspection of the room and address any repairs before estimating how much paint is needed. Most painting contractors estimate by the square foot.
There are a variety of paint colors to choose from when painting interior walls. From warm to cool and from neutrals to vibrant hues, you’ll find a color to suit your style. The key to good paint color is ensuring it blends well with the rest of the room. You can test it in different lighting conditions before committing to it. It’s also important to consider the color’s undertones, which will influence how it looks in a space.
White and off-white are traditional paint choices that can help create a clean, airy look for your home. In addition, white and off-white can highlight architectural features such as molding and windows. You can also use them to accent doors and trim, such as a built-in bookcase or niche. A popular choice is Sherwin-Williams’ Origami White, a warm white that works well in any room. It’s bright enough to open up large rooms and lighten dark trim, and it also holds up well to stains and smudges.
When choosing paint colors, keep in mind that trends come and go. While some are more durable than others, it’s important to consider the overall look of your home and its décor. The best interior paint colors complement your furniture, artwork, and accessories. They should reflect your style and mood, not just the latest fashion.
For example, you can try a shade of blue already in your kitchen to tie the two spaces together. If you prefer a bolder shade, consider a deep green. This trending hue will bring a touch of nature to your home. It’s also easy to pair with other shades, such as browns or greys.
Painting is a key home improvement project that can dramatically affect the appearance and feel of your interior space. It can also be a cost-effective way to update your home or business. However, it’s important to remember that good preparation is vital to achieve the best results. Proper surface prep ensures that the new coat of paint is adhered to the surface and stays that way for a long time. Surface preparation solutions include cleaning and sanding, variable sanding, caulking seams, patching holes and cracks, setting and spackling nailheads, and priming.
Before you can begin the actual painting process, it is important to establish a vision for your project. This will help you determine the color, paint type, and finish. It will also help you plan for any additional repairs that may be needed. A clear vision will help you stay on task and make fewer mistakes. It will also save you a lot of frustration and wasted time.
One of the most important steps in preparing for interior painting is to remove or relocate any furniture and other items that are in the way. This will prevent them from being damaged by dripping or falling paint, making it easier to move them back into place when the job is done. It’s a good idea to cover any furniture with plastic sheets or bags so it doesn’t get covered in paint dust.
It’s also a good idea to cover your floors with canvas drop cloths or plastic sheets to protect them from splashed paint. It would be best if you also unscrewed any light and outlet switch covers so that they don’t get painted accidentally. Finally, remove any pictures or other wall hangings that the paint could damage.
In addition to creating a more aesthetically pleasing look, painting the interior of your home can also boost its curb appeal and increase its value. It can also create a more comfortable living space and improve your overall health by improving the indoor air quality. It’s important to choose low-VOC paints as they will not release harmful chemicals into the air.
There’s nothing that refreshes a room’s aesthetic as quickly and easily as a fresh coat of paint. With creativity, even novice home painters can add texture and depth to their space with a few easy wall painting techniques. From subtle and sophisticated textures to bold style statements, these creative painting methods allow homeowners to transform their interior design without adding extra decor or infringing on their square footage.
One of the most important, often overlooked, painting techniques is “cutting in.” This brush sequence occurs where two surfaces meet, and a roller cannot reach—such as where the ceiling meets the walls or along trim and baseboards. This technique requires precision, and a professional can help ensure an even finish and avoid common mistakes such as “hatbanding,” a noticeable line where the cut-in color meets the finished paint.
Another popular technique is sponging, which involves applying a base coat of paint to the wall and then blotting it with a sponge loaded with a contrasting glaze. The sponge’s wrinkles and folds create a soft, textured look to the surface. This technique works well for rooms with a lot of natural light, as it can create a subtle shadowing effect.
A painter can use a stencil to apply a decorative pattern or wording to the wall. This can be a great way to incorporate a favorite quote or a personalized message into the décor of a room. A stencil can create a simple stripe or zigzag pattern on the wall.
Increasingly, professional painters are using finishes to create visual effects on the wall. For example, if you paint one wall with a flat or satin finish and the other with a semi-gloss, this creates a nice contrast between matte and sheen that draws attention to the wall.
Another way to add interest to a wall is by creating a checkerboard effect. This painting method starts with a light, neutral color as the base coat. Then, using painter’s tape, you can create horizontal lines across the surface. After the tape dries, you can paint the walls with darker stripes in a contrasting color. This look works well in bedrooms and living rooms and makes a statement regarding home design.
Interior painting is one of the most cost-effective home renovations, and it can improve a home’s value when done well. However, many factors determine the cost of a paint job, such as room size, color, and type of materials used. The overall cost can vary between $3 and $7 per square foot, but some areas may require more prep work, such as sanding rough surfaces or caulking cracks. In addition, additional services like touch-ups or specialty projects, such as murals, can increase the cost.
Interior paints are classified by their intended use, such as interior houses or wood paints. They are usually water-based and designed for walls, ceilings, or other surfaces within a home. They should provide good coverage, be easy to clean, and not contain chemicals harmful to human health. The specific color and gloss level of the paint also play a role in its price.
There are many different types of interior paints available for homes, including oil-based and latex paints. Some interior paints are self-priming, combining both the primer and paint into a single container, which can reduce the overall costs of a project. Choosing the right type of paint is important because it will affect how long it lasts and its ability to hide imperfections. For example, oil-based paints will have better adhesion and a smoother finish than latex, but they are much more difficult to clean up.
Typically, painting a home’s walls will include basic prep work that could involve cleaning stains or mildew, sanding rough spots, and patching holes. The cost of these services will be higher if the wall is made of plaster rather than drywall. In addition, if the wall is covered in wallpaper, it will take longer to remove that material and prepare the surface before painting.
If the walls are in good shape, a fresh coat of paint will make them look cleaner and newer. It will also improve air quality by keeping dust and other allergens to a minimum. For the best results, a professional painter should be hired to ensure the job is completed correctly.